

Running a UniFi controller in a Docker container on a Synology NAS


One challenge I ran across when deploying a UniFi network in my own home was, where to place the controller? The UniFi controller from Ubiquiti networks can be run on almost any hardware. The controller functions best when it is always running on the network, eliminating the option of running it on my workstation. They do offer a device called a Cloud Key, but the first generation was ripe with problems and the 2nd generation is a little too pricy to use just for the network management aspect, although it does start to show value if you use it as an NVR for UniFi cameras.
I decided to do some digging and found that someone had made it pretty easy to run the UniFi controller on a Synology NAS. I am running a Synology DS218+ at home so I decide this would be the best option for me.
This guide will show you the method I used to deploy this in my own network, it is by no means the only way to do this or the best way its just my way.
Step 1: Install Docker from the DSM package center
Log into your Synology device and open the Package Center from the main menu of disk station manager
in the search bar search for Docker
Click install next to the Docker Package
Docker will now install on your Synology
Launch Docker from the main menu
Step 2: Create a UniFi folder to store the UniFi config files
Now that Docker is installed you will need to create a folder to store the UniFi controller configuration files so that in the future you can tear this docker container down and rebuild it with a newer version of the UniFi controller without having to back up the controller. It really makes updating easy.
Open the file Station on your Synology and brows to the docker directory created when you installed docker. (If the directory does not exist create one named docker)
In the docker directory create a folder named UniFi (See fig 2-2)

fig 2-2
Step 3: Open docker and install the jacob alberty docker image for UniFi controller
Jacob alberty created and supports this easy to deploy docker image for the UniFi controller. He has a great reputation in the Docker community, and I have personally been running this container for around a year with no issues. He also provides updates often so you can update to the newer UniFi controllers when they are released.
Launch Docker from the main menu of your Synology
on the left-hand side select “Registry”
Use the search bar and search for “UniFi”
Select the Jacobalberty UniFi docker image and select download (see fig 3-4)
When prompted select “latest” from the dropdown menu of available images

fig 3-4
Step 4: Configure the image and deploy the container
In this step you will configure the options in the initial deployment package and deploy the image for use on your network.
On the left-hand navigation menu select “Image”
Select the Jacobalberty UniFi image you just downloaded
Press launch in the top of the docker window
A new window will open, and you can name your new docker container (See fig 4-4)
Select “Advanced Options” this will launch a new advanced configuration window
Under the first tab “advanced settings” check the option for “enable auto-restart” (See fig 4-6)
Move to the “network” tab and check the box for “Use the same network as Docker host” box (See fig 4-7)

fig 4-4

fig 4-6
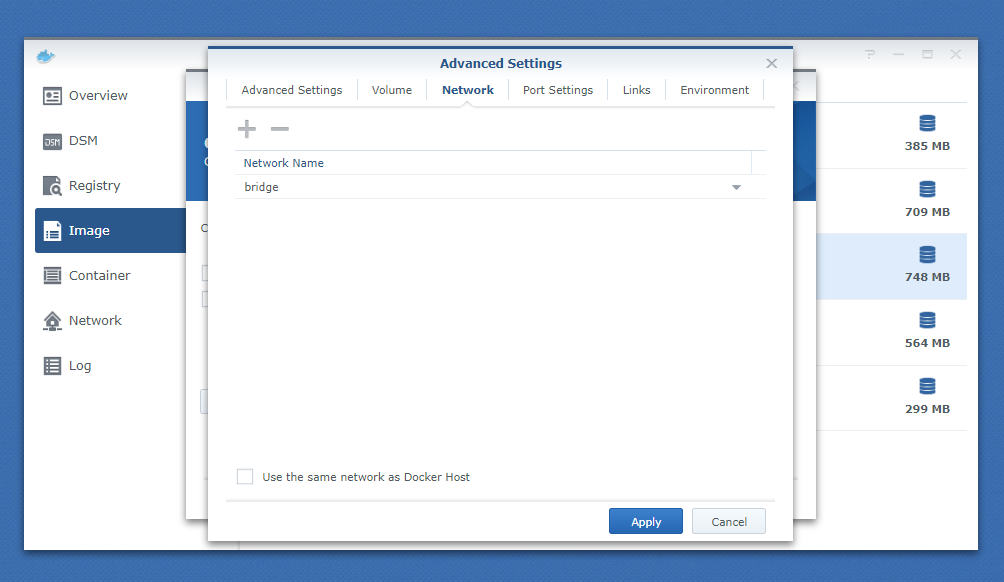
fig 4-7
Step 5: Mount the docker container to the unifi folder created in step 2
This step is crucial if you want to be able to tear down this container and rebuild later with a newer image. If you don’t do this, you would need to back up your UniFi controller anytime you wanted to update. Also, this has the added benefit of keeping your UniFi controller backed up to your Synology where there is most likely fault tolerance.
Select the “volume” tab
Select the add folder button
brows to the Unifi folder you created under the docker directory and press select (See fig 5-3)
set the mount path to /var/lib/unifi (See fig 5-4)
Click apply to save the volume configuration
Click apply again to save all of the advanced configurations
On the general settings page select next (See fig 5-7)
On the summary page, review all settings and click apply (fig 5-8)

fig 5-3

fig 5-4

fig 5-7

fig 5-8
Step 6: Log into your new UniFi controller and have fun!
after you apply the final configuration, docker should spin up the container and you should see it running in the “container” section of the left navigation window.
Open a web browser and brows to the web interface of the UniFi controller (Hint: Use the IP of your Synology followed by :8443 for example in my case I brows to https://10.0.10.250:8443 where 10.0.10.250 is the internal IP of my Synology.)
Click advanced and proceed through the not valid certificate error
You should now see the web interface of a new UniFi controller, you can either configure for first use or import a backup configuration file of a previous Unifi install.
Conclusion
I hope you found this guide helpful. I am always looking for new projects and am hoping to keep my blog updated with some of those projects. If you have any request for tutorials, please reach out to me through the contact us page on the website and I will try to accommodate any request. If you are interested in hiring Albuquerque Tech you can contact us through the same link!